环境:Windows XP GNS3.0.7 SecureCRT(可以不要) ADSL上网账号。
目的: 通过实验学习如何配置让路由进行ADSL拨号连外网
开始: (开始前把ADSL拨号连接断开)
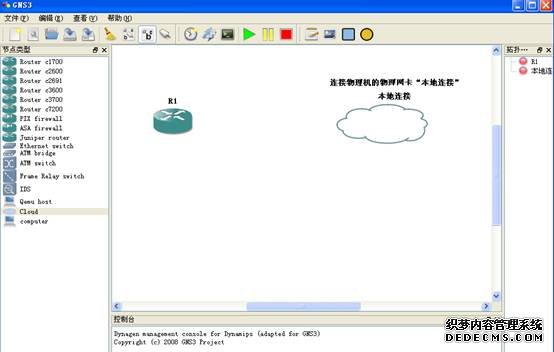
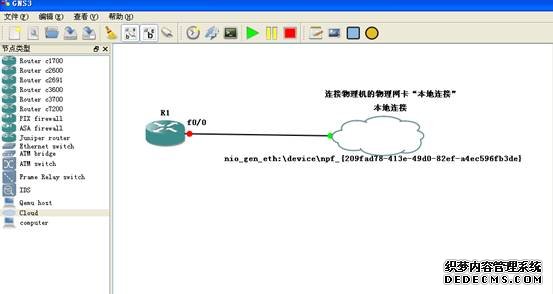
- 打开GNS新建工程构建如下拓扑:
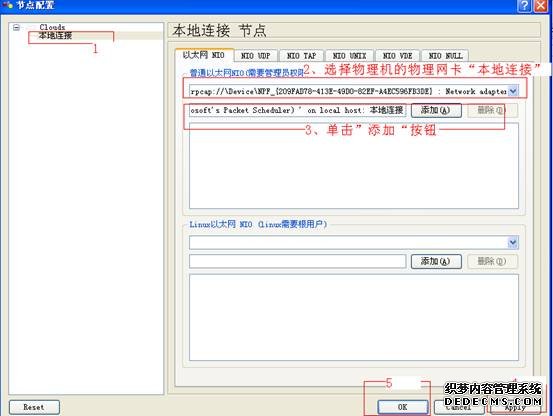
2、配置Cloud “本地连接“:右键“本地连接”选择“配置“进入如下界面后,选择本地连接网卡,然后按“添加”,再按“Apply“ 接着按“OK”:
3、在GNS工具栏中按“添加连接”接着用鼠标把设备连接起来如下 :
4、选中“R1”右键选择“开始”,接着继续选中“R1”右键选择“Console”出现如下界面:(因为环境中把SecureCRT集成进去,所以单击“Console”出现SecureCRT控制台,若果没有集成出现一个DOS窗口)如下:
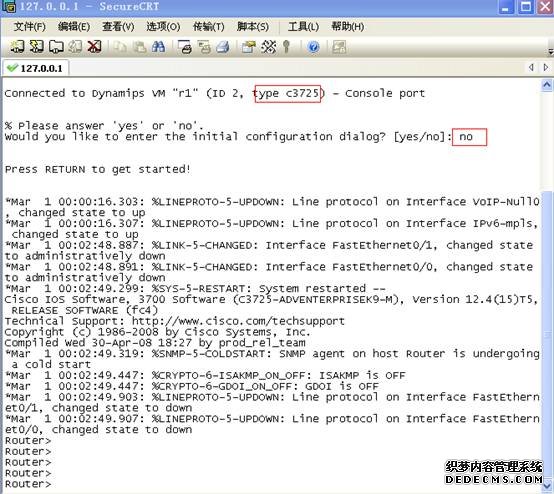
在SecureCRT中对路由器R1进行基本配置
Router>en
Router#conf t
Enter configuration commands, one per line. End with CNTL/Z.
Router(config)#hostname R1
R1 (config)#enable pass cisco
R1 (config)#lin con 0
R1 (config-line)#pass cisco
R1 (config-line)#login
R1 (config-line)#no exec-timeout
R1 (config-line)#logging synchronous
R1 (config-line)#exit
R1 (config)#line vty 0 15
R1 (config-line)#pass cisco
R1 (config-line)#login
R1 (config-line)#logg synchronous
R1 (config-line)#no exec-timeout
R1 (config-line)#exit
5、配置R1开启vpdn功能,命令如下
R1(config)#vpdn enable
R1(config)#vpdn-group inner
R1(config-vpdn)#request-dialin
R1(config-vpdn-req-in)#protocol pppoe
R1(config-vpdn-req-in)#exit
R1(config-vpdn)#exit
R1(config)#
6、配置R1 与“本地连接“相连的接口fa0/0进行拨号 ,命令如下:
R1(config)#int fa0/0
R1(config-if)#no ip add
R1(config-if)#no sh
R1(config-if)#no shutdown
R1(config-if)#speed auto
R1(config-if)#duplex auto
R1(config-if)#pppoe enable
R1(config-if)#pppoe-client dial-pool-number 1
R1(config-if)#exit
R1(config)#
7、配置逻辑拨号接口:命令如下:
R1(config)#interface dialer 1
R1(config-if)#mtu 1492
R1(config-if)#ip address negotiated
R1(config-if)#ip nat outside
R1(config-if)#encapsulation ppp
R1(config-if)#no ip mroute-cache
R1(config-if)#dialer pool 1
R1(config-if)#dialer-group 1
R1(config-if)#no cdp enable
R1(config-if)#ppp authentication pap callin
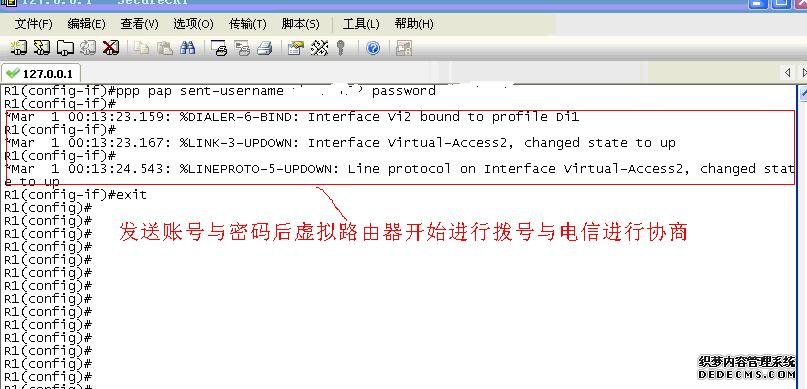
R1(config-if)#ppp pap sent-username “用户名” password “密码”
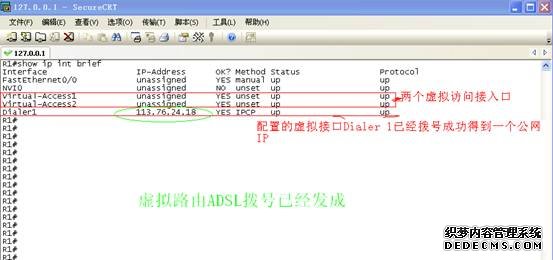
8、查看: